Category: Tools (Page 2 of 2)

Some Post-Holiday Mumbling

This Christmas was definitely a good one for my photography equipment. My lovely wife gave me an all-weather hood for my DSLR, a 5-in-1 reflector kit, and a flash bracket. Unfortunately I had to return the flash bracket as it could not be used with my camera. The resulting store credit netted me a backdrop cloth for studio type work. My mother sent me a Visa gift care which will soon be used to purchase a rack to hang said backdrop. Combined with the light kit I purchased a couple months ago I should have a nice little portable portrait studio. Now I just need to figure out how to parlay that into paying customers, but I digress.

I also received a Barnes and Noble NOOK reader for Christmas. The first book I purchased was “Pictorial Composition in Photography” by Arthur Hammond. I basically purchased it because it was free. The first (and from I can tell only) edition was written before 1923 and as such no longer has any copyright protection under US law. All that aside, the book seems to have some good information, even when I filter out the stuff that hardly exists these days (orthochromatic plates, anyone?) and has given me some things to ponder with my own compositions. The author seems to hold a disdain for pigment prints such as gum bichromate. He seems to feel it takes away from photography as its own art form by blurring the lines between itself and other artistic mediums. All I have to say to that is whatever. Personally I find the alternative printing processes give a flexibility to photography as artistic expression, but that’s this author’s lowly humble opinion.

At this point I need to get to work on some other non-photography related items. I have a few pictures that I will be discussing in some upcoming posts so until then, to all my faithful and not-so-faithful readers, I bid you goodnight.

Aside from the e-book, I also purchased “On Photography” by Susan Sontag (in print form as no e-book version was available). I’ll start on that one soon. From what I’ve gathered, that book is required reading in some university photography programs. I’m interested to see what Ms. Sontag has to say on the subject of photography as I’m definitely looking to expand and deepen my thinking when I’m working on my own stuff.

Gum BiChromate Printing

I just realized that I never updated anyone on my education in the Gum BiChromate printing process.  Well, let me start by saying “I’m sorry”.

The inspiration to learn this print process got its genesis when I saw some of Peter Liepke’s work in Silvershotz magazine.  The colors achieved via this black and white process captured my attention first.  Coupled with the soft focus, the photos attained a very dreamlike look, almost as if I was looking through a fogged window into someone’s mind.  I didn’t know anything about this process, but I knew I liked what it could produce.  Since I don’t have the facilities in my home to set up a dark room, I didn’t think much about it until a few months later.

As part of my learning in Photography II this past semester, I was required to provide an oral presentation on an alternative printing process (i.e. other than what we were doing in class).  Gum bichromate immediately came to mind as I read the project list.  When I spoke with the instructor, she seemed happy that I was choosing a 19th Century process (and it was something she did extensively while earning her MFA).  I was told that she possessed all the chemistry to produce a print and all we needed was time for her to go through one with me if I wanted to produce one myself.  I immediately jumped at that chance.

Well, it turns out that chemistry portion of producing a good print isn’t quite as extensive as it is when producing a traditional silver print.  To make a traditional silver print, one needs developer, stop bath, fixer, permawash (for fiber prints), and water.  To make a gum bichromate print one only needs watercolor pigment, Gum Arabic, a dichromate salt (either potassium or aluminum), and water.  Seems pretty simple so far.

First I had to choose my photograph.  For this project I used the following photo:
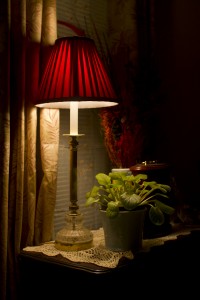
From this photo I produced 3 negatives printed on acetate.  One was a black and white negative and the others were negatives that filtered out the red and green colors, since I was going to use those in my print.  Since traditional photographic paper is watercolor paper with an emulsion of light sensitive silver salts coating one side, I only needed good quality watercolor paper as the print base.  I preshrunk the paper (in order to minimize the paper’s natural tendency to flex when wet and while drying) and began the next step.

Here is where we get into the chemistry.  My first order of business was to mix some Gum Arabic with a solution of potassium dichromate.  This had to be done in the dark as dichromate salts are light sensitive (the light was dim as I still needed to be able to see what I was doing).  After thoroughly mixing the compounds, I coated one side of a test strip and one side of the sheet that would contain the final print.  After letting the paper dry again, I took the test strip and negative outside to expose the paper to the sun.

The next step was to develop the test strip.  The great thing about this is the only chemical needed is plain water.  Dichromate salts become insoluble as they are exposed to light and they harden the gum arabic mixture on the paper.  The water washes away the pieces of gum bichromate that can’t stick to the paper (usually in the highlight areas).  Once I developed the strip, I was able to mount the full negative on the sheet and repeat the process for print creation.

The first print turned out better than the teacher had expected for someone doing it for the first time.  I was pretty proud of myself, but I knew that the process was going to be repeated a couple more times before I could consider the print finished.  I had to run another pass for each color filtered negative and I had to make sure they lined up perfectly with the first (known as registering).  If the negatives didn’t register perfectly, then I would be left with something not so good.  The only difference in the process from the first run was the mixing of pigment in with the Gum Arabic before mixing in the potassium dichromate.

As you can see from the photos below, the negatives did not register perfect as there was some slippage during transport outside.
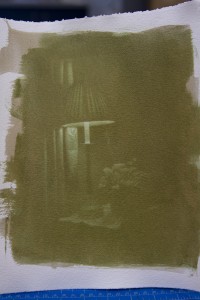
The dry print after the second layer was added. Here I mixed in the green pigment.
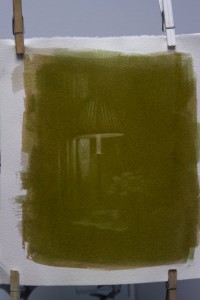
After adding the red pigment. The shadows have gotten deeper, but the negative was not perfectly registered.

The third layer  had yet to dry on the second photo, which is why it has a bit of a glossy look.

All in all, it was a fun experience.  I still need to fill in some of the shadow areas, which will be done with a graphite pencil here in the next week or two before I can show everyone a final image.

Since this process is not silver based, the expense in terms of money is not high at all.  In fact, a 35-pass kit from Photographer’s Formulary runs about $28 and a bottle of dichromate salts (which will last quite a while) runs about $30.  The most expensive part of the process will be the time invested in creating a great print.  It takes several layers of gum bichromate for the shadow areas to really pop out, which makes exact registration of the negative a must.  There are also concerns about the safety of the dichromate salts which must be address.  Dichromate salts are not only toxic, they are also known carcinogens.  One will not develop cancer right away from the first exposure to these salts, but care must be taken to minimize direct exposure.  They are also powerful eye and lung irritants, so care must also be taken when preparing the solution and during mixing.  That said, I would recommend at the very least gloves and goggles when handling the salts, solution, and wet gum bichromate mixture.  I would also recommend using a sink that isn’t used for any other purpose (such as getting ready for work or doing the dishes).

All in all, this was a fun experience and this knowledge is something I would like to develop.  I just need to figure out how to get a sink in my garage at a reasonable price.  Feel free to check the links below to see Peter Liepke’s work and the website for Photographer’s Formulary.

Peter Liepke Photographs
Photographer’s Formulary

The Ever Expanding Lens Collection

For a long time I’ve been fascinated by selective focus. In selective focus the photographer is able to seemingly focus on a certain subject in a frame while the rest of the image (even in the same plane) is out of focus. The first photograph where I realized the power of selective focus was the Keith Carter photograph “Broken Leg“.

In this photo we can see selective focus and the power it can lend to an image. The only thing in focus is the animal and its immediate surroundings. The childs face is so distorted we cannot see his or her expression. Was the child responsible for the condition of the animal? Did the child happen upon the animal? The black clothing suggests perhaps this is Thanatos taking the form of a child and coming from the great unknown, ready to collect the next body for the afterlife. Or is this a social statement on how man preys upon other species and there is no innocence concerning this, not even in a child?

The use of selective focus is what gives the image its power. Although the child’s legs are a not much out of focus, as you go up toward its head, the image is more and more out of focus, even though they are in the same plane.

In a normal camera the film plane and the lens plane are parallel. This in turn gives us a depth of field where the front and rear planes of focus are also parallel (and parallel to the lens and film planes). Because of this you can’t achieve this image with an normal SLR camera and lens setup.

Medium and large format photographers have the advantage of being able to use a bellows system. If you look at a 19th century camera and see the accordian type material on the front, you are looking at the bellows. The bellows system allows the photographer to change the plane of the lens, which also changes the plane of focus so it is no longer parallel with the film plane. When used in conjunction with good compositional technique, an image can indeed become very powerful, as evidenced in “Broken Leg”. Carter makes extensive use of selective focus in his work.

I have a medium format film camera, but in my research they don’t make a bellows system for it. I can’t afford a large format camera and even then the bellows systems tend to add another 4 digits to the price of a large format system.

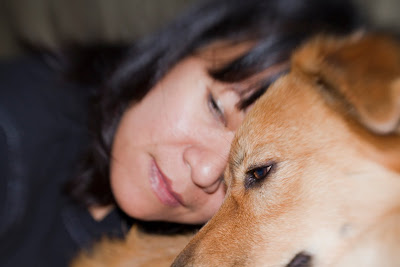
Which brings me to the point of my post. For my birthday this year I got a Lensbaby Composer for my DSLR. This lens allows for selective focus on a normal SLR system, although it does not have the flexibility of a full blown bellows. I’ve been playing with it as I’ve had time. I’m still trying to figure out how to manipulate the “sweet spot” to get the image I want, but it’s a lot of fun. Here are a couple of images I shot with the Lensbaby:

The first image, of my German Shepherd, was taken the day after I acquired the lens. I still had a lot to learn about using the lens at this point, but as you can see, the area just above her eye gets more muddled even though it’s in the same plane as the eye. The second photo is of my wife and my Golden Retriever/German Shepherd mix, taken nearly a month after acquiring the lens. Here I was able to get the human and dog eyes in focus while the rest is out of focus. You can really see it in my wife’s shoulder as opposed to her eyes (the shoulder and the eye are both in the same plane) and the dogs eye compared to her face as you move out.

I can tell I’m going to have a lot of fun with this lens. Perhaps I can see if there is a custom bellows kit I can order for my DSLR somewhere out there. But then again, I better start saving my pennies if one exits – those systems aren’t cheap by any means.

Exposure

Few things can be as confusing to a new photographer as the concept of exposure. I can assure you now that I am not the exception here. Often I find that I missed a good shot because, while my meter said it was ok to go, I did not expose that part necessary to accurately capture my vision.

When the lighting is for the most part even, exposure is generally not a problem because, well, the lighting is even. However, as those who have spent a little time behind the viewfinder know, light rarely is even in any given composition. There are areas of light and dark which run a pretty wide gamut. This is where the problem usually occurs as exposure of one extreme often causes the other to suffer.

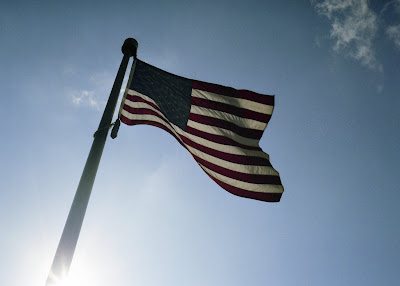
Here is a case in point. The first flag picture below was taken with a Pentax 645 with Kodak 400VC film. For this picture I placed the center of my viewfinder over blue sky (I don’t remember exactly where) and snapped the picture. The result was a nice blue sky, but the flag, as you can see, was very dark.

I metered the picture and snapped it when it said ok, but I didn’t think much about what it could look like until I thought more about the settings. The camera was set at f/22 with a 1/1000 shutter speed (which also happens to be the limit for this lens/body combination). When I looked at the flag again and thought about what it would look like, I correctly predicted that the flag would be dark, but to be honest I really wouldn’t know for sure until the film processed. I decided to take the picture again only this time I decided to expose the flag and recompose. The result was a much more vivid flag:

The other thing you may notice about this is the sky went from a semi-bright blue to a bluish gray color. I’m no light scientist, but I would venture to say that this is because the camera let in 4 times as much light this time around (f/22 at 1/250) and the result was a slight overexposure of the sky. When I got the film back from the lab and scanned it in, I was amazed at how much difference existed between the 2 photos when just changing the exposure base.

The reason I can bring this to you now is this marks the first time I made a concerted effort to record my settings after each photo. In the past I metered, shot, and moved on to the next thing. I find in film this can be a little self-defeating as since I couldn’t check on the settings at the time of the photo, I wasn’t able to make any correlations on why one photo worked and another didn’t work (from a technical stance… aesthetics are another matter altogether). I could check shooting digital, but even then with the sheer number of digital pictures it becomes somewhat overwhelming comparing all the settings.

When it comes to digital versus film exposure, there is a fundamental difference. My first photography professor told me that it is better to overexpose than underexpose because an overexposure contains more “information” than an underexposure. Well, I took this information to a concert with me and found that I took a lot of overexposed shots that no amount of digital manipulation could fix. What my professor left out was that overexposure is better for film photography (unless of course you have a 15-second shutter speed at 2:00 in the afternoon). I can’t really blame her for that as we were supposed to be focused 100% on film photography. When it comes to film, you should generally expose for shadows where in digital you should generally expose for highlights. From what I can see, highlights can be recovered quite well in the darkroom, but DSLR camera sensors don’t handle blown highlights nearly as well as a pack of Ilford paper.

So the biggest lesson here is to record, whenever possible, the settings used to take a picture. It takes a little work in between shots, but when specific settings can be tied to a specific photo it becomes very easy to see what works and what does not. This will hopefully translate into one being able to take the best picture the very first time.

As always, comments are accepted and welcome.

PS – As for the flag picture, a little light and color balancing on the 2nd shot yielded me what I think is a beautiful flag. I call it “Phoenix Rising”.

New Toys

I know it’s been a while since I posted here. While I have been shooting (and my flickr profile attests to this), I really haven’t been challenging myself for the past few months. I spent some time in Los Angeles near the middle of July, but most of my shots were of the snapshot variety. The one time I got to try to take some really breathtaking shots of the city was ruined due to heavy smog. Oh well, better luck next time.

I did get a new toy from the UPS man today. I had been in the market for a new point-and-shoot digital as I found the limitations on my Olympus quite… well, limiting. After careful research I decided to get the Ricoh R8 digital camera. This camera got some really great reviews in terms of features and had better than average image quality. It also has one thing that most cameras do not have – a really close macro function.

In fact, this camera can macro focus with only a space of 1 cm between the lens and subject. That’s some of the closest macro focusing I’ve seen on any camera. To compare, the macro lens for my DSLR requires 12 inches from subject to leading element. The Olympus Stylus 770SW requires 8.4 inches from subject to lens in regular macro mode and 2.8 inches from subject to lens in Super Macro mode. I’m in the process of playing with it, but I do have some pictures to share with you…


I call this one “Gozer Kitty II”. There is a membrane inside the posterior wall of the retinas of many mammals, which is why you get reflections when you shine a light directly in the eyes of a cow, a raccoon, or in this case, a cat. Human retinas do not have this membrane present. The cat looked at me as the flash was going off. I normally try to use as little flash as possible, even on point-and-shoot cameras, but this time I was testing the power of the built-in flash.


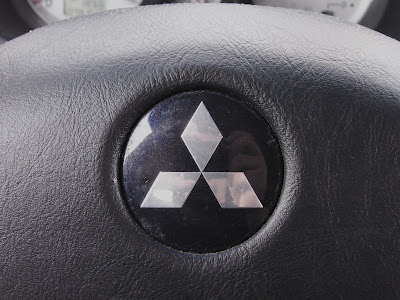
This was me taking a picture of my steering wheel while waiting for a train to cross. I had to macro off at this point and was amazed at the level of detail captured so close to the steering wheel without macro. It also shows that I need get a toothbrush on the inside of my car soon.


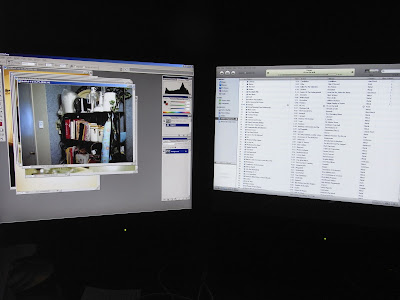
So while I was scanning some film I picked up the camera and took a picture of my Windows workstation. The screen shots are pretty clear here, better than I expected. My Olympus seems to have problems metering the LCD screens sometimes and gives mixed results. I love how the displays seem to be floating in a sea of black.


Finally here is a macro shot. I know this isn’t a super sharp focus, but I think this camera holds its own very well here. The camera was only a little over 2 cm from these CD spines and was able to get a clear picture of the labels underneath the plastic. My Olympus has what’s called a Super Macro mode that lets you get really close, but it has problems figuring out the subject and so the focus is sometimes hit or miss. On other macros taken earlier with this camera, it got the correct subject about 75% of the time on the first try and was almost always corrected when recomposing the image.

All in all, I think I am going to be pleased with this camera. The image quality is great and once I learn the different features of this camera, I think this will open up some creative possibilities when I find myself without my SLR or DSLR. I know that the camera is just a tool and that it’s the person looking through the viewfinder (or in this case, LCD) that makes the picture, not the camera. But let’s face it, sometimes if the tools aren’t there, the job doesn’t get done.

Digital Toolbox

One of the amazing things about digital is the vast array of tools that are available to the photographer for processing the shot. Indeed, the amount of hardware and software packages available is astounding. You can get a Chromira processor for a price that runs well into 5 digits, a scanner dedicated to film (thus creating digital pictures from film), full featured software such as Adobe Photoshop, or even small programs like Apple iPhoto. All these things help someone take the picture from the camera and do amazing things with the picture.

Most of my photos would not be possible without the tools in my digital toolbox. All my film photographs are scanned directly from the negatives rather than prints. I use an image editor to clean the dust from the scan (sometimes dust is inevitable and DigitalICE takes too long). Then I use Aperture to correct and exposure issues, etc. with the image. Some say this is cheating, but most things that can be done in Aperture can be done in the darkroom as well. I try as much as possible to take the picture correctly the first time, but there are times when the output can be improved upon. Even the great Ansel Adams used darkroom tricks to improve his prints. I’m sure that if he had lived to see what can be done with a computer, there would be digital tools in his arsenal.

Now that I have a little more time, I am starting to explore some more the digital tools out there. I use Aperture for much of my processing work. Up until now there weren’t that many plug-ins available for Aperture. Since the release of 2.0, however, the plug-ins have started to trickle in. This evening I downloaded trial versions for 2 of the plug-ins available and decided to see what I could do. Here is an image that I played with earlier:

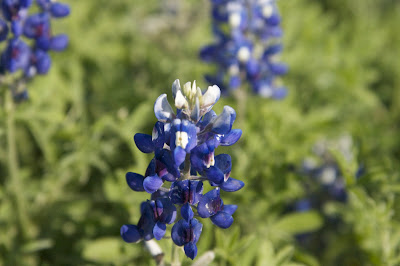
This is the original picture exported directly from the RAW file. For those not from Texas, this is the Texas Bluebonnet, a flower native to Texas that draws out the photographers from every hiding place in the state each spring. When I took this photo, I accidentally left my camera in ISO1600, which gave me a lot of noise. Also, the colors seemed a little washed out to me. Since my focus was on the flower and not the field around it, I cropped the picture and fired up AKVIS Noise Buster and got this result:

This is now a more noise-free photo. I left the out-of-focus flower in the picture to keep the original subject from being too centered and to let the viewer know that this was taken in a field of bluebonnets and not in a garden or a flower pot. I discovered AKVIS a while ago and have used it much since it’s purchase. In fact, most of my concert photos go through AKVIS. The colors were still a little washed to me, so I imported the new noise-free image to Aperture to tweak the colors and ended up with this result:

To me now the blue in the flowers really pops out against the green of the grass. The only trouble is now the flower in the background stands out a little more. I suppose I could have cropped the photo closer to the subject, but I just didn’t want a totally frame-filling subject. This picture is what would eventually end up in my flickr photostream. Some people seem to like it.

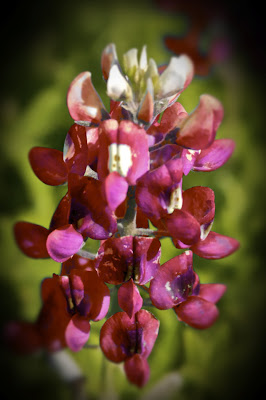
So I was reading through some groups and found that there were plug-ins available for Aperture. So I went and downloaded DFT Ozone and Tiffen Dfx. DFT Ozone allows for selective color changes while Tiffen Dfx is a filter plug-in. I took this image to see what I could do with it in both the plug-ins and this is my result:

Now I have a centered portrait of a Texas Redbonnet (doesn’t exist for those non-Texans out there). DFT Ozone was used to change the color of the petals while I used Tiffen Dfx to add the vignetting. The final edit was the crop in Aperture to tighten the image. There is still a trace of the other flower, which still gives the impression that the picture was taken in a field. I wish I had saved a copy of the image between plug-ins, but before that I hadn’t even planned this blog entry.

I know that I’m not even scratching the surface when it comes to digital tools available. I found an Aperture plug-in earlier that will allow one to isolate the area of the image to be edited. That one will be downloaded a little later. I know that many will say that Photoshop offers some of these things as standard, but there are drawbacks to Photoshop (cost, learning curve, etc.) that drive users to seek other solutions.

As always, comments are welcome and encouraged.

Color Film

My Pentax 645 came with a 220 film back. At the time I didn’t know the difference between 120 film and 220 film so I really didn’t care. Well, when it came time to buy film, I realized there is a difference. The biggest difference between 220 film and 120 film is the number of exposures – 220 gives 30 exposures where 120 gives 15 exposures. What I found is that 220 film is becoming exceedingly difficult to find. My only option in black and white was Kodak Tri-X 320, and honestly I’m not really a fan of Tri-X film.

Off to eBay I go and finally (after getting sniped on 2 other auctions) I got a 120 film back for the reasonable price of $33.00. The seller also threw in 4 rolls of Fuji Reala 100 film. Well, what was I to do? I immediately shot up the 4 rolls of film and had them processed by a third party (I don’t know how to process color quite yet). Here are some of the results.

 
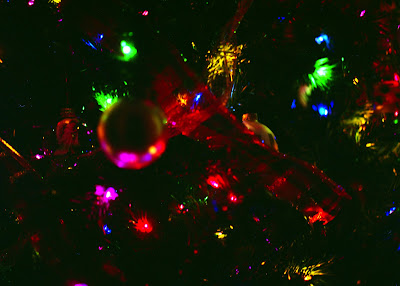
Ok, I admit it – I’ve always had cameras that automagically read the ISO of the film canister and I’ve never worked with medium format before. I was shooting Tri-X 320 before I got the film back and film and, you guessed it, I forgot to set the ISO on the camera. This was the result of the film being pushed but not developed as if it were pushed. This shot of my Christmas tree definitely sucks.

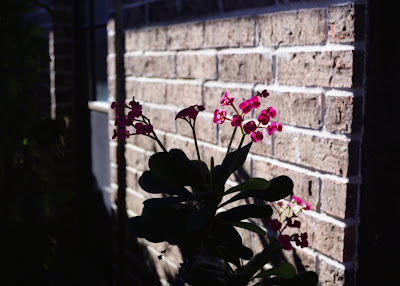
This shot was from the same pushed roll. The image itself came out good, but the colors were off. The evidence is the fact that these flowers were red, not pink. I guess the reason the bricks didn’t come out funky has something to do with the fact the sun was shining directly on them. This picture, however flawed from its original intent, came out very powerful (at least in my opinion).


After realizing my mistake and setting the proper ISO on my camera, I shot the last 2 rolls of film. This one was properly exposed, but for some reason very washed out. I’m not sure what happened because the images before and after both came out fine. If this had come out, I think it would have been pretty kick ass.

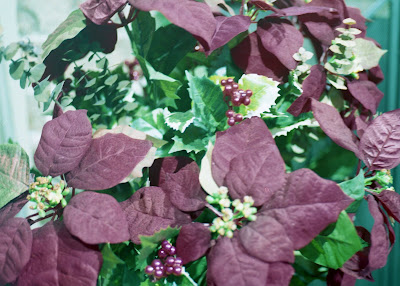
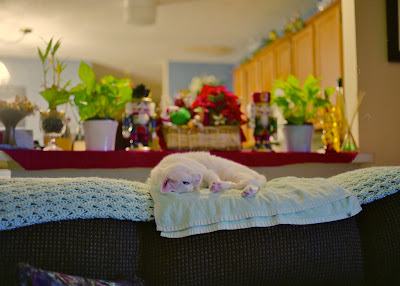
Now these 2 above are my success stories. In both instances the exposure came out perfect and the colors, after a little tweaking in Aperture, were dead on. I’ve found that my cat is actually a very difficult subject to focus because of her color… but this time I was able to get her and some of her fur detail. The poinsettia is my favorite of the 2 rolls that were shot properly as the detail was something I wasn’t expecting.

So, 60 pictures were taken and only 4 usable came out of it. I would say it was a pretty good day. I did find out one thing, though – I have a lot to learn when it comes to color photography in film. Digital pictures are easy to manipulate, but film is a whole different beast. I’ve been told that we will be working with color film next semester. This should definitely prove to be interesting.

As always, comments are welcome and encouraged so I can get better.

New Toys

I made the leap from 35mm film to medium format film with the purchase of a Pentax 645 Medium Format Camera. There was a little bit of a learning curve as the controls were different from my digital and film Canon SLR cameras. This camera is a bit older so the ranges on the shutter speeds aren’t as great as on my newer Canon’s as well. Also, the shutter button is a little touchy, which makes metering a little bit tricky. I may start carrying my film SLR to help with metering until I figure out a way to stop the camera from snapping the picture every time I think about pressing the shutter release.

Let’s not forget the film. The film I have to use with it is 220 film, which takes 6cm by Xcm pictures. In my particular case, the pictures will be 6cm x 4.5cm. Even though this is a smaller medium format, it’s still much bigger than 35mm. With 220 film I get about 30 exposures on the roll, which isn’t bad. The problem with 220 film is that it is starting to become hard to find locally. I can find some at the bigger online camera stores, but in an emergency, online isn’t going to help much.

The lens I have is a 75mm f/2.8 leaf shutter. Basically it’s a manual lens. I can set the shutter speed on the lens itself. Of course, doing this would require a handheld light meter, which I can’t afford and don’t want to carry. The good thing is that I can set the shutter speed to be controlled by the camera body, which allows the oh-so-tricky metering. The aperture and focus, however, are both set on the lens, which I have absolutely no problem doing.

Now for the fun part… the pictures. The following pictures are among the first taken with the camera in my possession:


This would have made a very nice portrait of the water wall at Williams Tower. The problem, however, is the right side. The dark area is a result of the film not being developed properly, which was my fault. During processing of 35mm film, I use 10 oz of a 1:4 solution, which completely covers the roll. In this case I failed to take into account the physical size of the 35mm film versus the 220 film, which is much bigger. The 10 oz of developer solution did not cover the whole width of the roll and, well, you see the result. Even though this picture failed, we can use this dark space to our advantage as seen on the next picture:


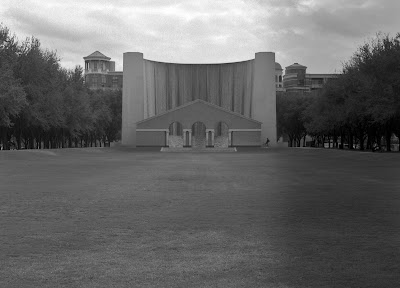
This is the headwater into the reflecting pool at my college. The underdeveloped right side looks like a shadow. Did you know that to just to the right there is a very large building that could have possibly cast a shadow into the water? You probably didn’t, but there is a large building just to the right of the headwater of the reflecting pool. I’ll just leave out the fact that a shadow cast on this water will never happen unless the planet develops develops a deeper tilt.


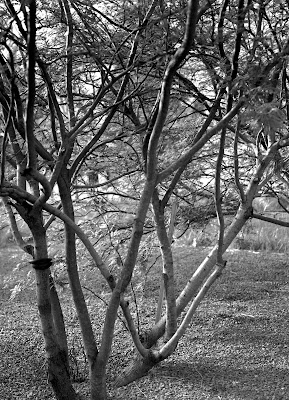
Sometimes nature covers your mistakes for you. The darkness of the tree makes it hard to perceive the dark underdeveloped area to the right. If you look close, you can see the water to the right of the tree trunk is a little darker, but off-hand I don’t think one would notice it.


Every roll has to have at least one usable picture and I feel this one is it. There is nice contrast and tonality here. Also, the shadows hide the underdeveloped area really well. Some may not care for the subject matter, but at this point I’m getting used to my new toy.

At this point I haven’t scanned the whole roll. My negative carriage can only scan two medium format negatives at the same time and it got a little late.

I hope you all enjoyed the pictures. Feel free to comment at will because I need the feedback to grow.

Newer posts »